How to Paint a Garage Door
March 7, 2016
As a large part of your home�s facade, a beautiful, clean garage door makes a huge difference in curb appeal. Repainting your door will give you that refreshed look and extend it's life and it�s really one of the more simple home improvement projects you can do, usually only taking a day or two to complete, depending on how many coats you require. Here's a quick how-to to get you started!
What You Will Need
- Dropcloth
- Step stool
- Sanding sponge
- Old brush for dusting
- Rags
- 3-inch latex brush
- Masking tape
- Stir stick
- 5-in-1 tool or paint can opener
- Paint bucket
- Exterior paint (semi-gloss sheen recommended for easy maintenance)
Preparations
Possibly, the most difficult part of painting anything on the exterior of your house are the variables beyond your control, ie. weather, dirt, animals and other people. You just have to do your best to minimize their impact. Aim for a day that that isn't too cold or too warm (your door shouldn't feel warm to the touch) and a time when you won't be working in the direct sunlight. Windy and rainy days, for obvious reasons, should also be avoided. Taking the time to ensure the proper conditions will greatly reduce your stress levels and keep the job nice and easy.
Once you've marked the day on your calendar, you'll need to buy your supplies. Factors to take into consideration are the material of your door, whether you'll need a primer, and how much sanding and stripping will be necessary. Most modern doors are made of aluminum, which is easy to paint and most exterior paints will work. But it is always recommended to at least check with the paint dealer. If you are simply refreshing the door�s current paint job, and your door is in decent shape, you probably won't need to worry about priming. But if you are drastically changing the color or really want that impeccable, professional look, buying a primer or at least a paint/primer combo is a safe bet.
The amount of paint and primer you will need will depends on the size and material of the door. Wood doors generally will require more paint. Take the measurements with you when you go to buy your paint, and always buy more than you think you'll need.
To make your life significantly easier while painting, your first step needs to be to put your garage in manual lift mode. To do this, you'll simply need to locate the garage�s emergency release cord, here's a quick tutorial if you've never done this before.
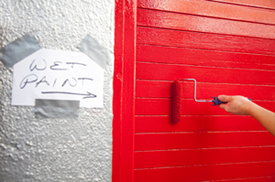
For most garage doors in average condition, a simple cleaning and good rubdown with a sanding sponge should be preparation enough for your paint job. But the cleaning is essential, do not skip this step. Every exterior door will have some oxidized paint, dust, rust and dirt. Also be sure to wipe down the door thoroughly (including the gasket at the bottom) after sanding.
When it comes to masking, it's always better to be safe than sorry. If you intend on painting the trim of the garage the same color, you will save a bit of prep time, but it is still important be ensure the non-painted areas are covered. A large drop cloth is essential, as it is very difficult to get paint out of concrete.
Priming & Painting
Priming and painting required basically the same steps with about a 12-24 hour dry time between. Be sure to give your paint a good stir, even if it was shaken at the store. Pour about a quart at a time in a separate paint bucket and be sure to close the original can tightly in between uses. If you begin your painting and priming at the bottom of the door, you can open it to a level that's comfortable to you and move it down as you do. Be sure to avoid painting the gasket at the bottom. Paint the door one panel at a time to keep track of your progress and avoid missing any spots. To get the edges of the individual panels, move the section up to the bend to expose the inside then lightly paint. Before you get to the top, make sure your drop cloth will be under the door when it closes.
Trim and Clean-up
If you've decided to paint the trim of your garage, you can do it at the same time. Once you are completely done, do a good once-over scan to make sure you don't have any drips or missed spots. Allow at least 12 hours of drying time in between coats, and ensure everything is completely dry before removing your masking tape.
One weekend of fun and voila! A shiny new garage door! Hope this guide helped - from San Diego Precision Door

$119.95 Value!